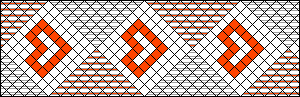
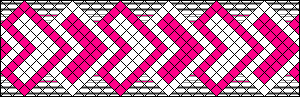
If you like this pattern but don't want to do the shaped part of it, maybe use pattern #34101 because its very similar but colour C makes a border along the edge
This pattern is too thin to use the standard shaped technique for normal bracelets. Here’s how I do it instead.
Notes on knots: -a regular knot in friendship bracelets is made of 2 parts, i.e. two half knots made from looping one string TWICE around another. -for this technique, you will need to do some half knots, that is to say, you loop the string only once around, not twice -a * sign in this tutorial indicates HALF a knot
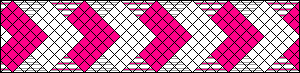
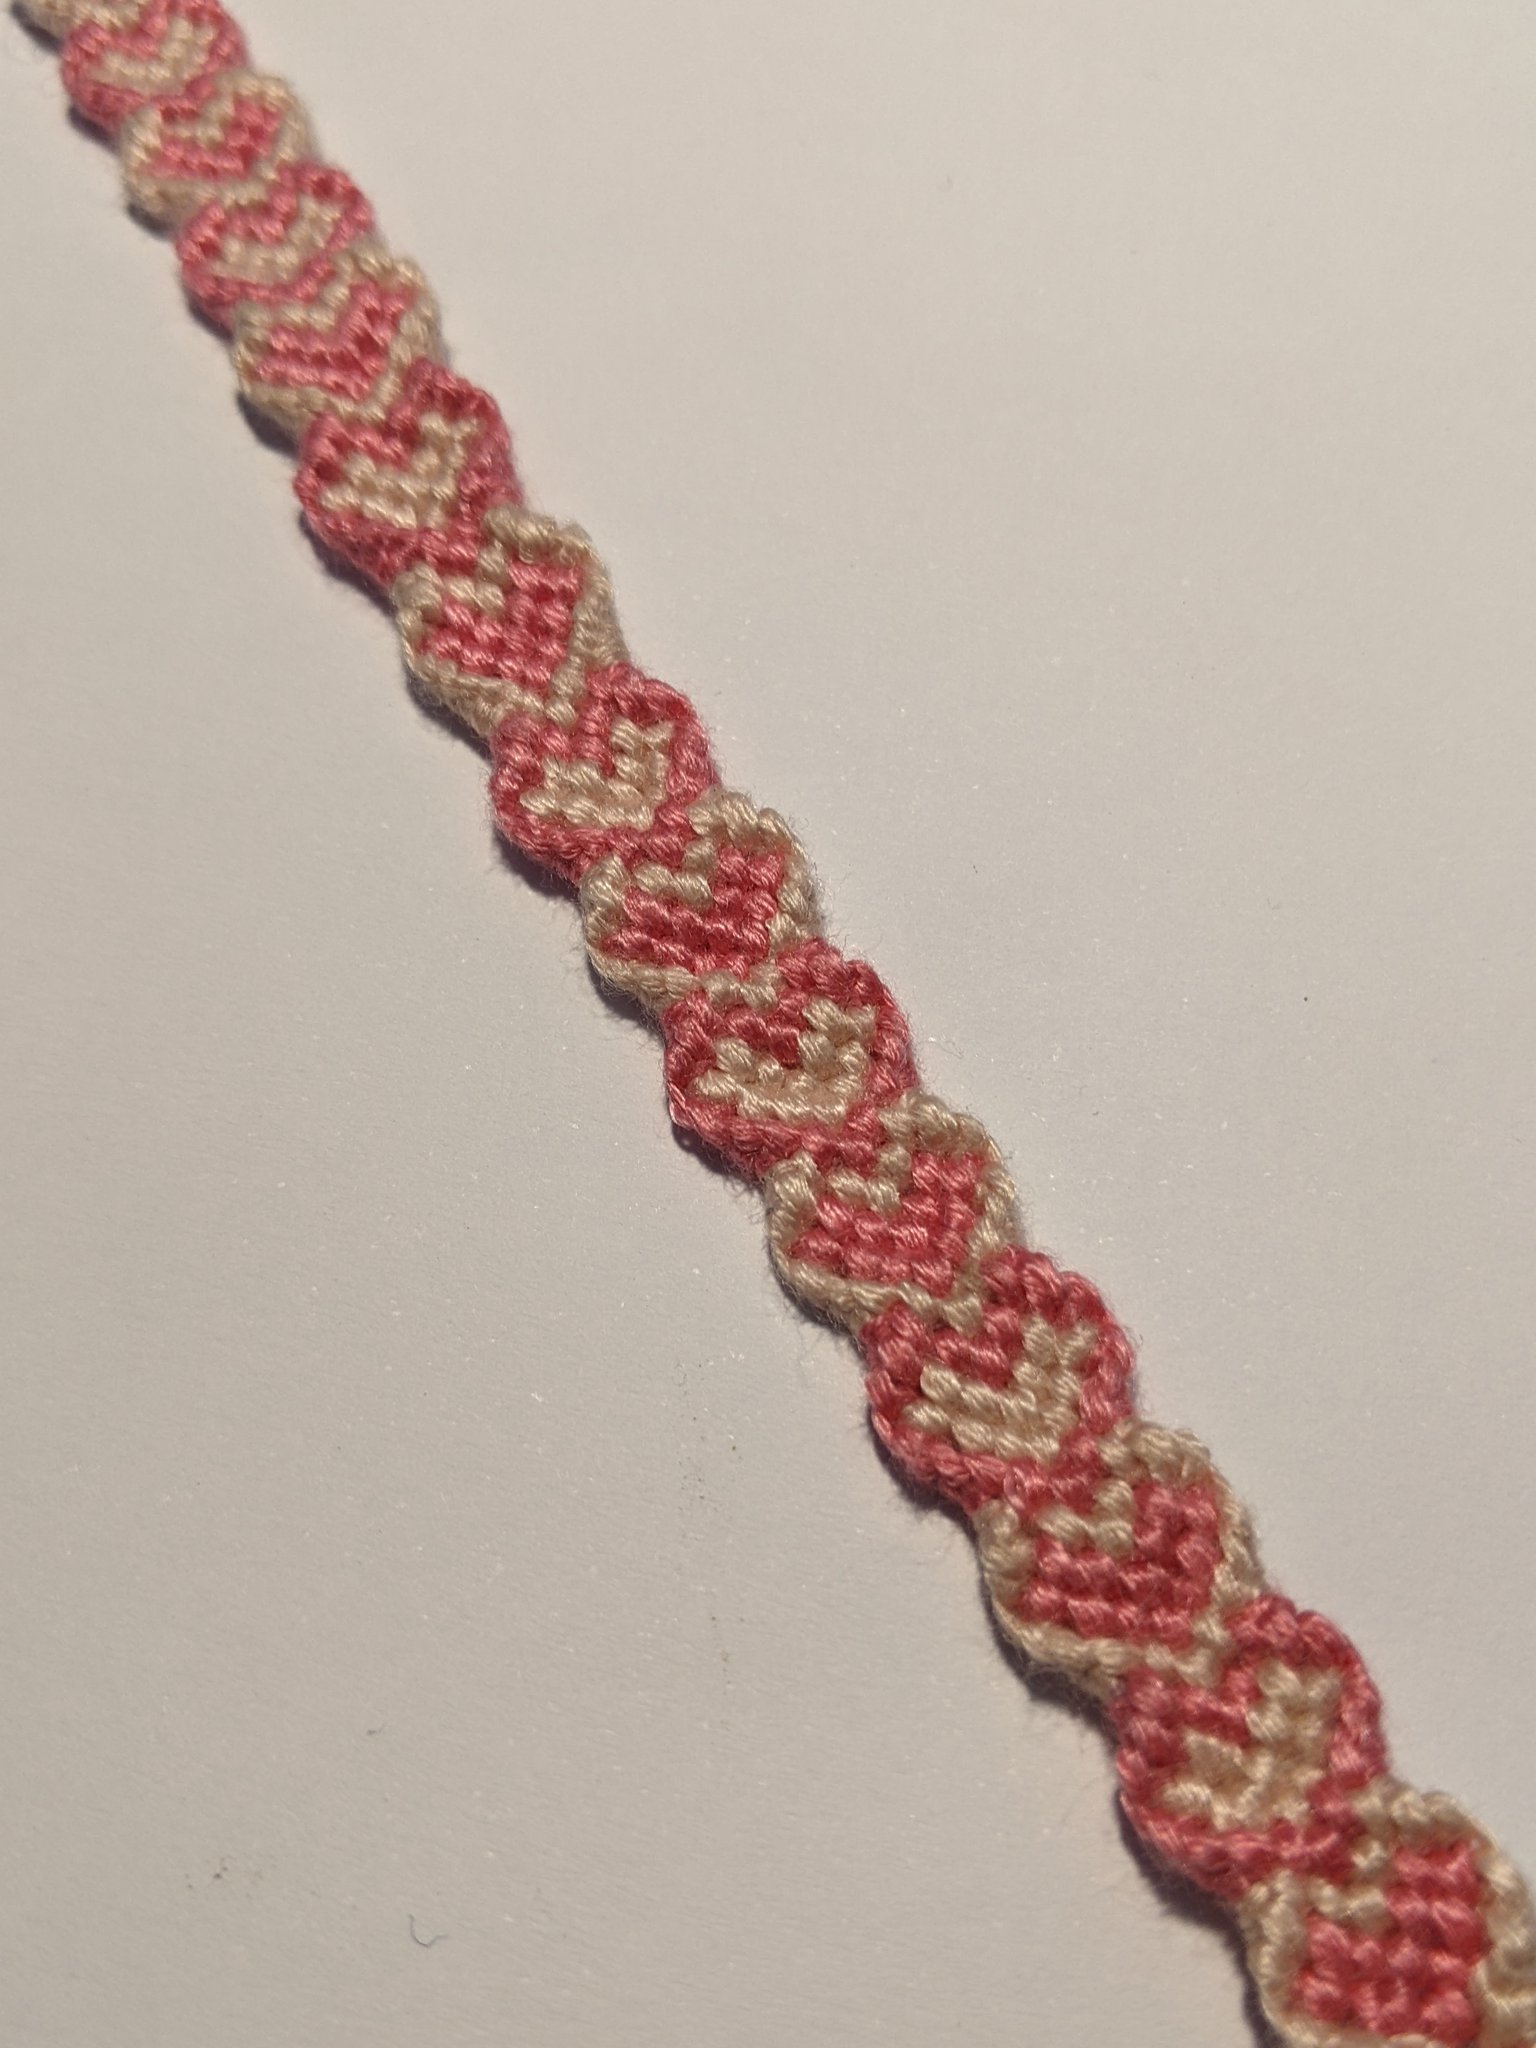
1. Cut the strings. Cut 4 strings of colours A and B, all equal length (except one string; add a few extra inches to make the top of the loop). Cut 2 strings for colour C. These strings can be much shorter than the rest as you won’t be tying any knots using this string. -note on picking colours: colour C will show up in the loop and in the end ties, so it’s nice to pick a colour that compliments colours A and B
2. Make the loop as normal. The colour order at the start goes ACABB-BBACA as I will start my bracelet at row 5 (the bottom V of the heart). To make the following instructions clearer, I’m naming the strings as follows A1, C1, A2, B1, B2 (left hand side) - B2”, B1”, A2”, C1”, A1” (right hand side)
3. On the left hand side: 1. FB of A1 over C1 2. F* (half a knot) of A1 over both strings C1 and A2 3.F* (half a knot) of A1 over C1, A2 and B1 4. FF (I.e. a regular forward knot) over B2
4. On the right hand side 1. BF of string A1” over colour C1” 2.B* (half a knot) of A-1 over both strings C1” and A2” 3.B* (half a knot) of A1” over C1”, A2” and B1” 4. BB (I.e. a regular backward knot) over B2”
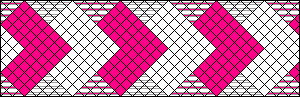
5. Join the two A strings (A1 and A1”) up in the middle. You have now completed the bottom of the heart.
6. To make the top of the next heart (left-hand side): 1. Make a B* (half a knot) with B2 over strings B1, C1 and A2 THEN make another B* knot around JUST B1 2. Make a B* (half a knot) with B2 over C1 and A2, then make another B* (half a knot) around just A2 3. Make a BB knot with B2 over C1
7. Right hand side: 1. Make a F* (half a knot) with B2” over strings B1”, C1” and A”2 THEN make another F* knot around JUST B1” 2. Make a F* (half a knot) with B2” over C1” and A2”, then make another F* (half a knot) around just A2” 3. Make a FF knot with B2” over C1”
8. Complete the rest of the heart as you usually would when following a normal pattern
9. Repeat
I promise this isn’t as complicated as it sounds! I would make a video tutorial but I don’t have the right set-up and don’t know how to edit videos. If anyone else wants to make one then please go ahead!
Okay so my strings snapped when I tried to make a video tutorial so I'll just type it instead
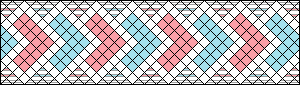
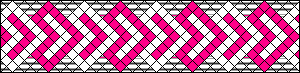
-the bracelet is too thin to use the normal shaped technique
-starting at the V of either row 5 or 13 you do -a FB over the 'base string' colour C -a F (only half a knot!!) over colour C and the next colour A -a F (half knot) over colour C, colour A and colour B
Do the same for the other side but with B instead of F knots
Then follow the rest of the pattern as normal until you get to row 5/13 again.
I'm (hopefully) going to do a video tutorial on how to do this soon because you can't use the typical technique for shaped normal bracelets so stay tuned for that!