Rate Tutorial
Hi everyone! I’m @KnotsBySav and this tutorial is for the macrame endings for alpha keychains and wallhangings (aka tapestry ending). This is my favorite way to end my wallhangings! For this tutorial you should already know how to make a square knot.
If you do not know how to make a square knot, I recommend this video by Curly Made on YouTube.

From mymodernmet website.
You will need:
- your alpha keychain or wallhanging without an ending
- scissors
- tape
- scissors
- tape
Step 1
You will begin with your keychain or wallhanging without an end. The last row should be completed. Secure it to your workspace.
Step 2
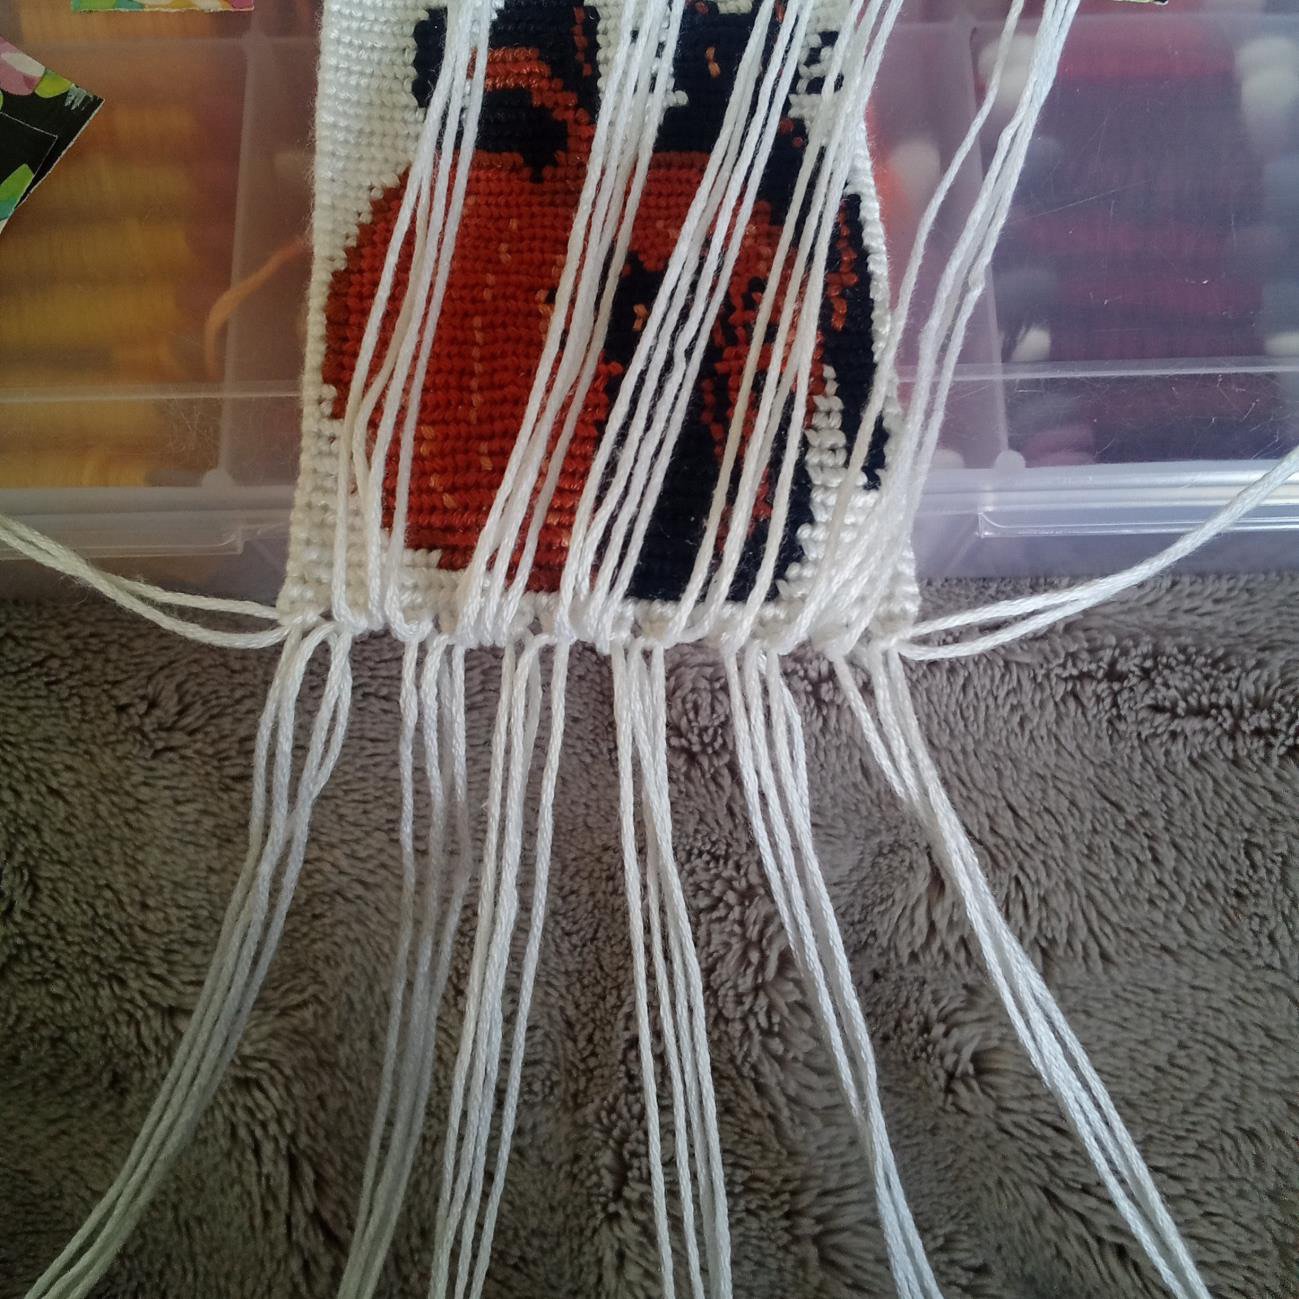
Separate your base strings into groups of 4 including your leading string from the last row of your pattern.
If your base string bundles are uneven with:
1 extra string – 1 group of 5
2 extra strings – 2 groups of 5 with one on each end 3 extra strings – 1 group of 3
If your base string bundles are uneven with:
1 extra string – 1 group of 5
2 extra strings – 2 groups of 5 with one on each end 3 extra strings – 1 group of 3
Step 3
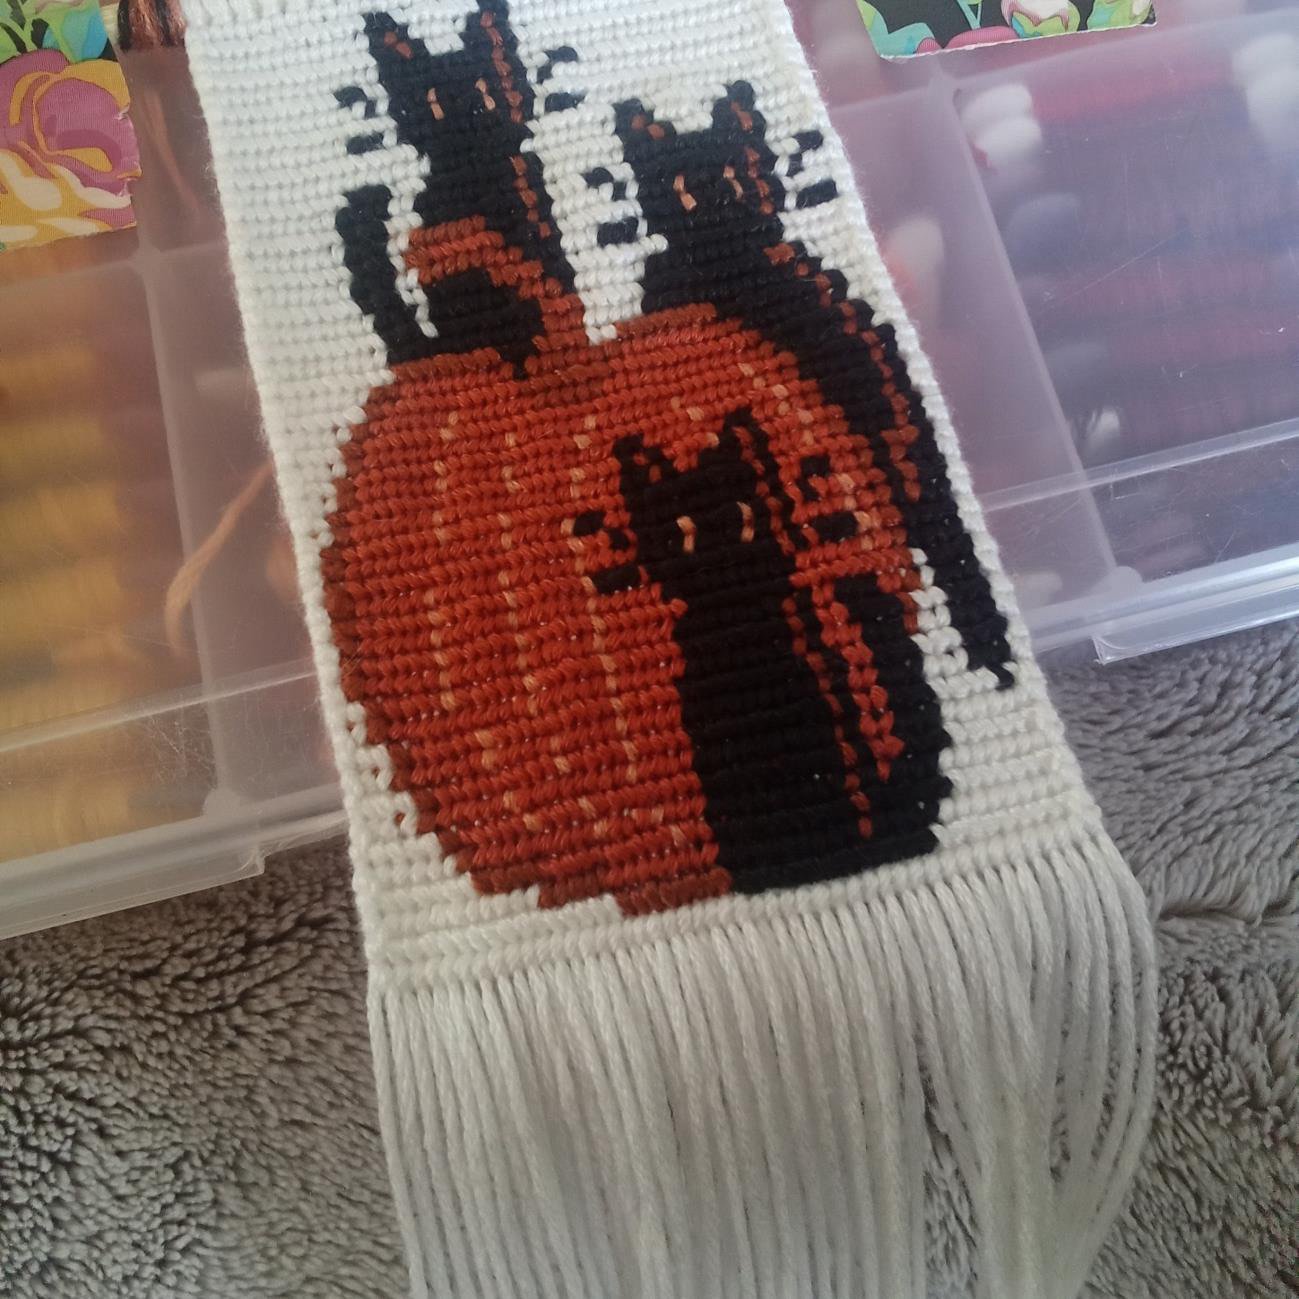
For each bundle, you will make a square knot with the two strings on each side. Whether you have a group of 3, 4, or 5, your knot should still be the same. Continue making your square knots with each bundle of base strings across the entire wallhanging.
Optional - If you want a more steep V-shaped ending, do 2 square knots for each group. If you want a more open V-shaped ending, only do 1 square knot. Don’t make the knots too tight because it will stretch out the design and possibly cause your pattern’s edges to become uneven.
Optional - If you want a more steep V-shaped ending, do 2 square knots for each group. If you want a more open V-shaped ending, only do 1 square knot. Don’t make the knots too tight because it will stretch out the design and possibly cause your pattern’s edges to become uneven.
Step 4
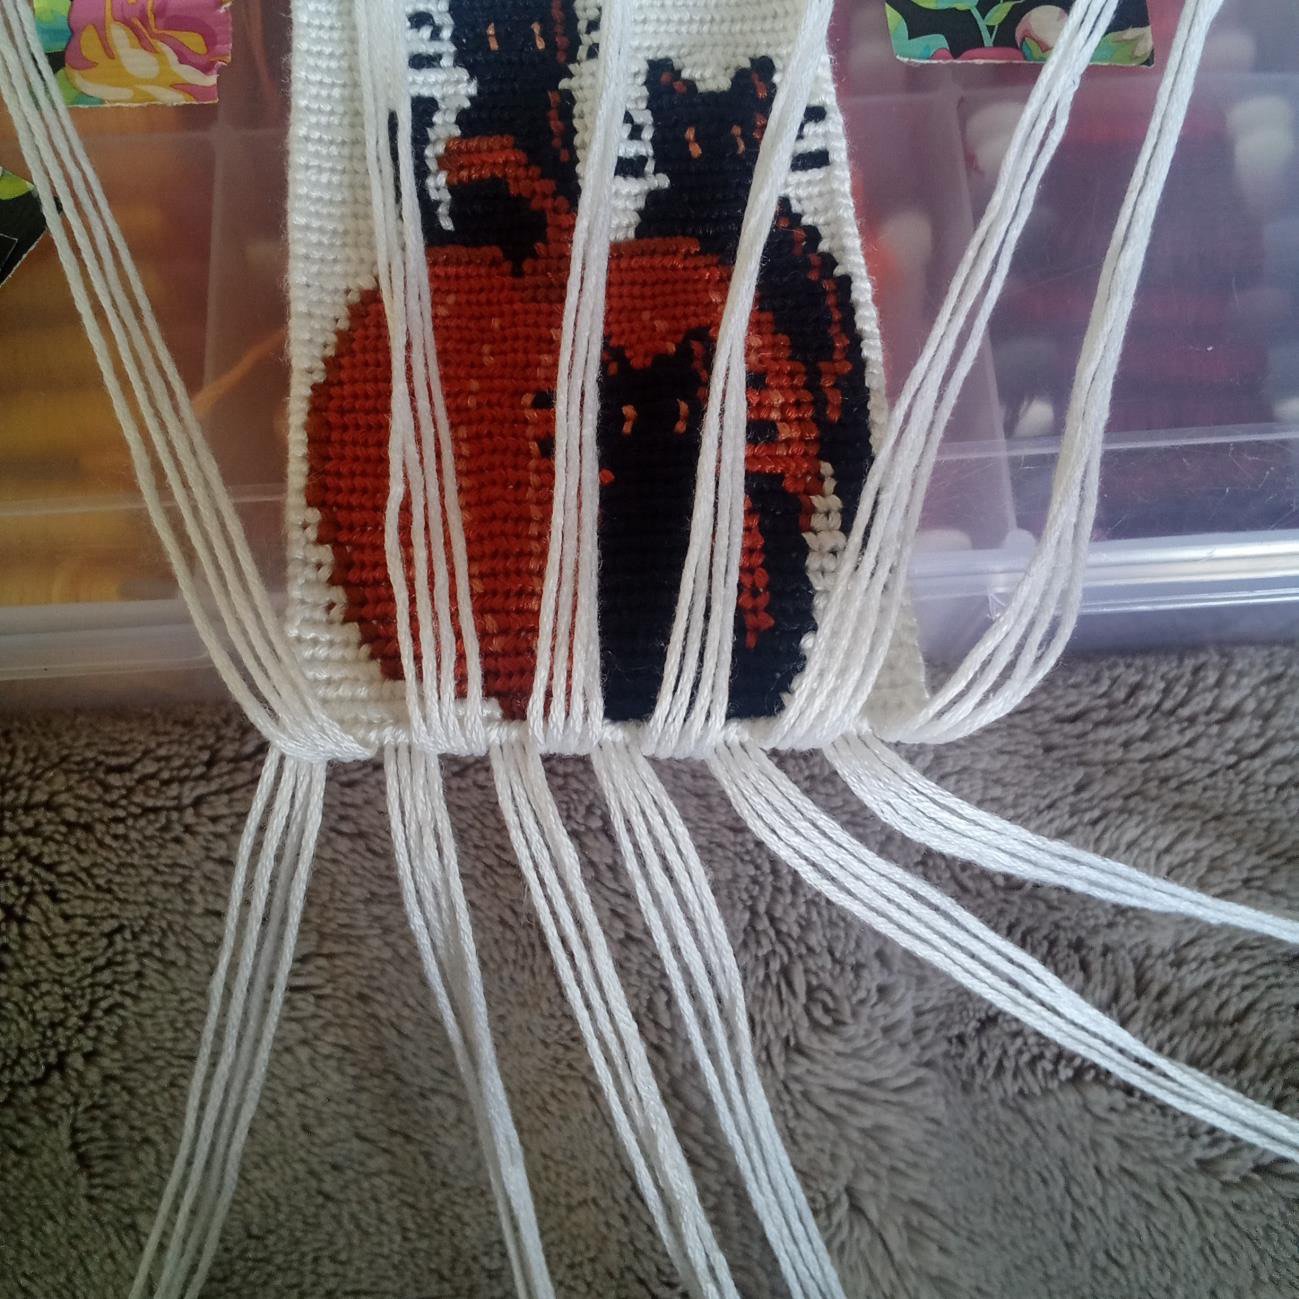
Once you have made your row of square knots across the wall hanging, take out the two outermost strings from the left and right sides of each bundle. For each row of square knots, you will exclude the 2 outermost strings from the left and right sides.

Then, regroup your strings into bundles of 4 excluding the 2 strings you took out from each side. This means you would do half of one bundle and half of the one next to it for each new bundle you create.
You are basically making a “net” of square knots.
You are basically making a “net” of square knots.

Step 5
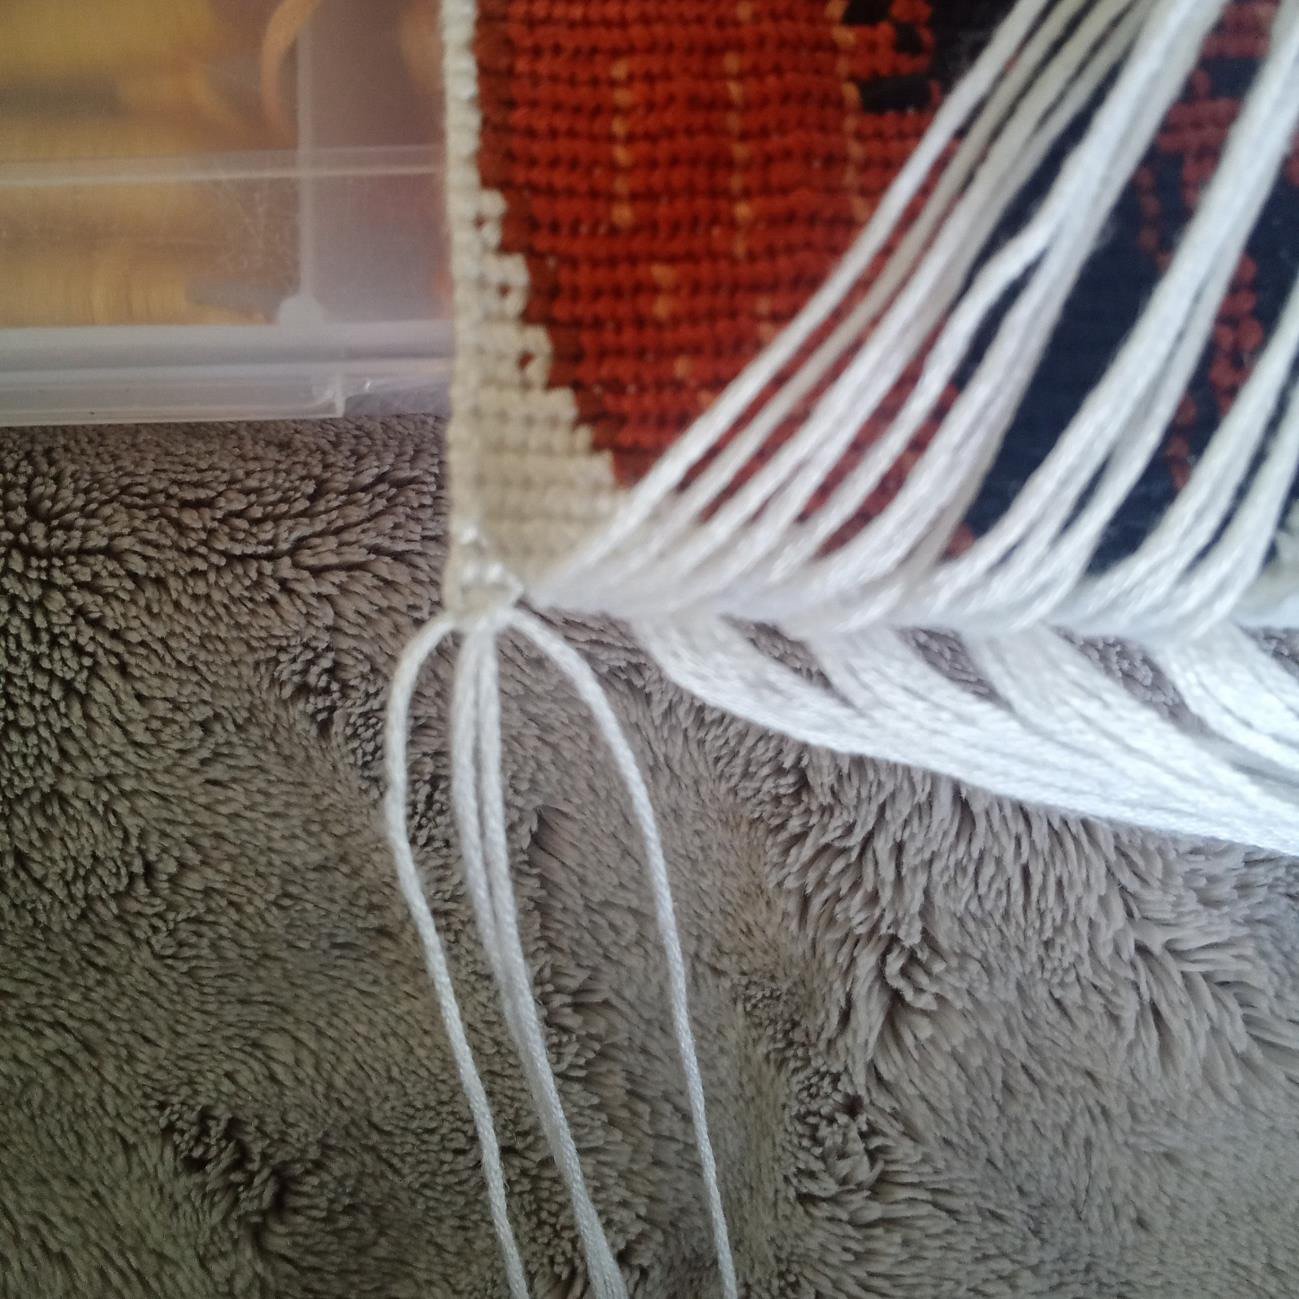
Repeat Step 4 until you have 1 knot left. You should make your last square knot tightly.
Step 6
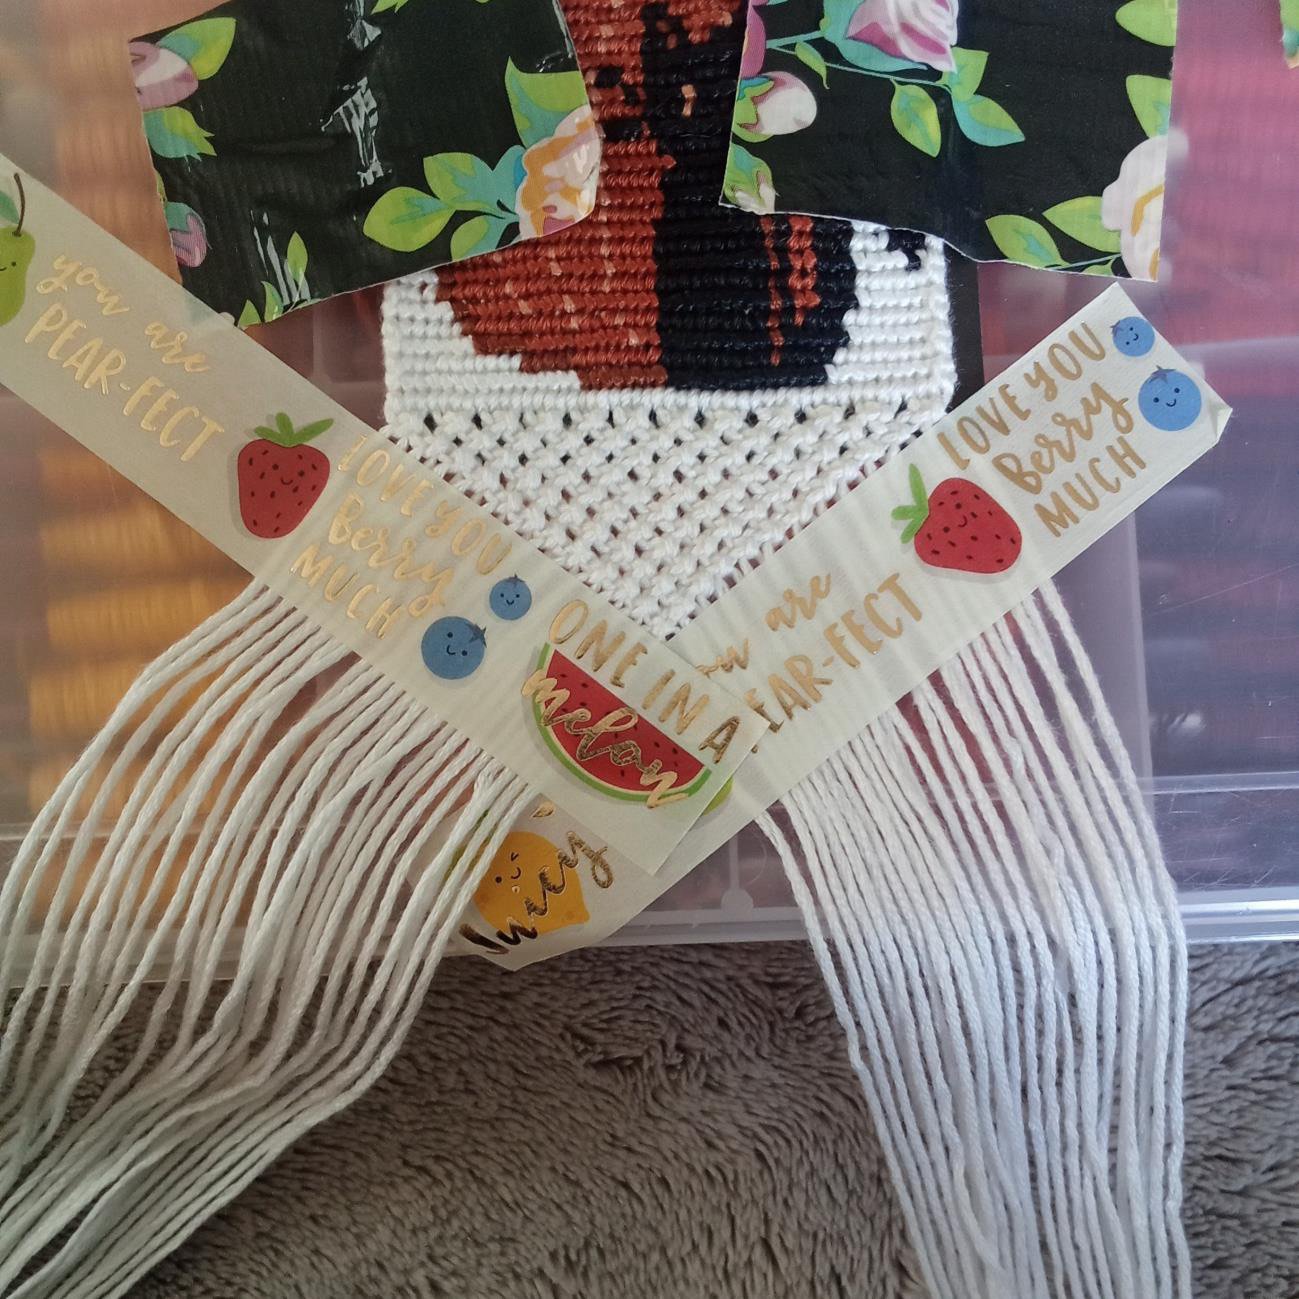
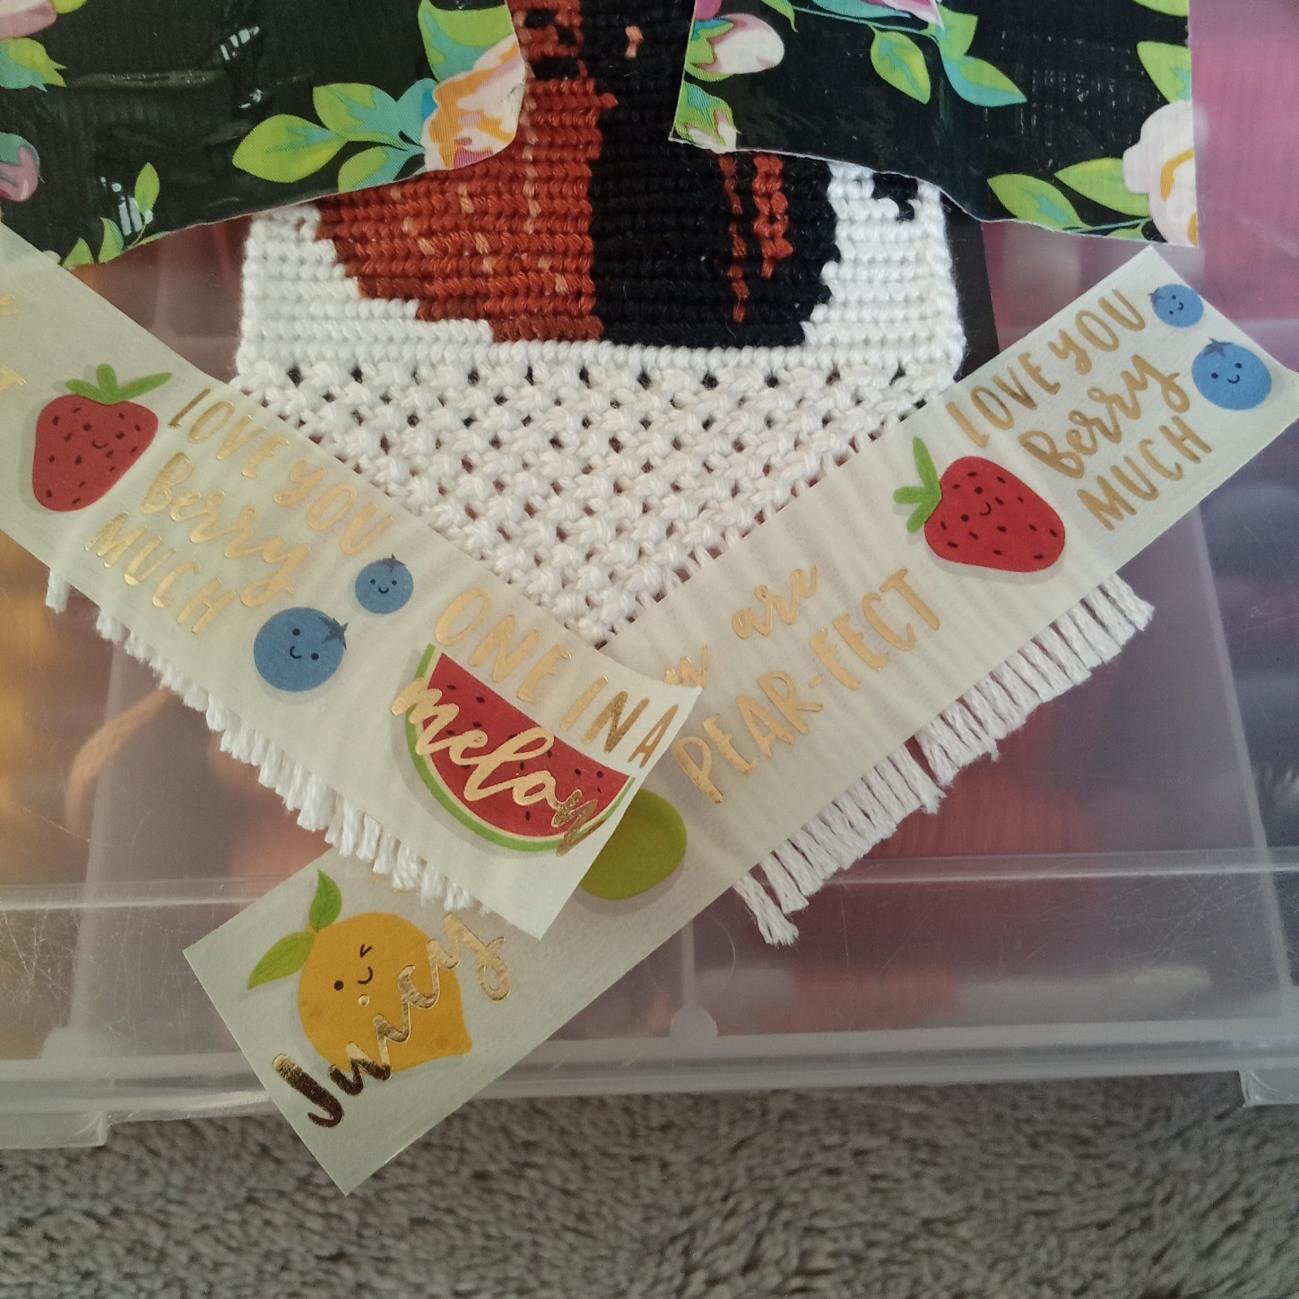
Tape down the loose strings of your wallhanging along the V-shape as shown. Make sure your tape isn't on top of any of your square knots. I recommend you use washi tape because it will not pull on your threads when you take it off. Remember the bottom of your tape shows where you will cut it, so if you have a slimmer piece of tape, you can place it higher or lower.
Step 7
Cut your thread along the tape. It will not be perfect. How short you decide to cut your base strings is completely up to you. You can always cut them longer and then trim them shorter to your liking.
Then, remove your tape and trim the threads to your liking. I also like to take a sewing needle and comb through the threads to fray them. I find it helps to make it look a bit better.
Then, remove your tape and trim the threads to your liking. I also like to take a sewing needle and comb through the threads to fray them. I find it helps to make it look a bit better.
Step 8
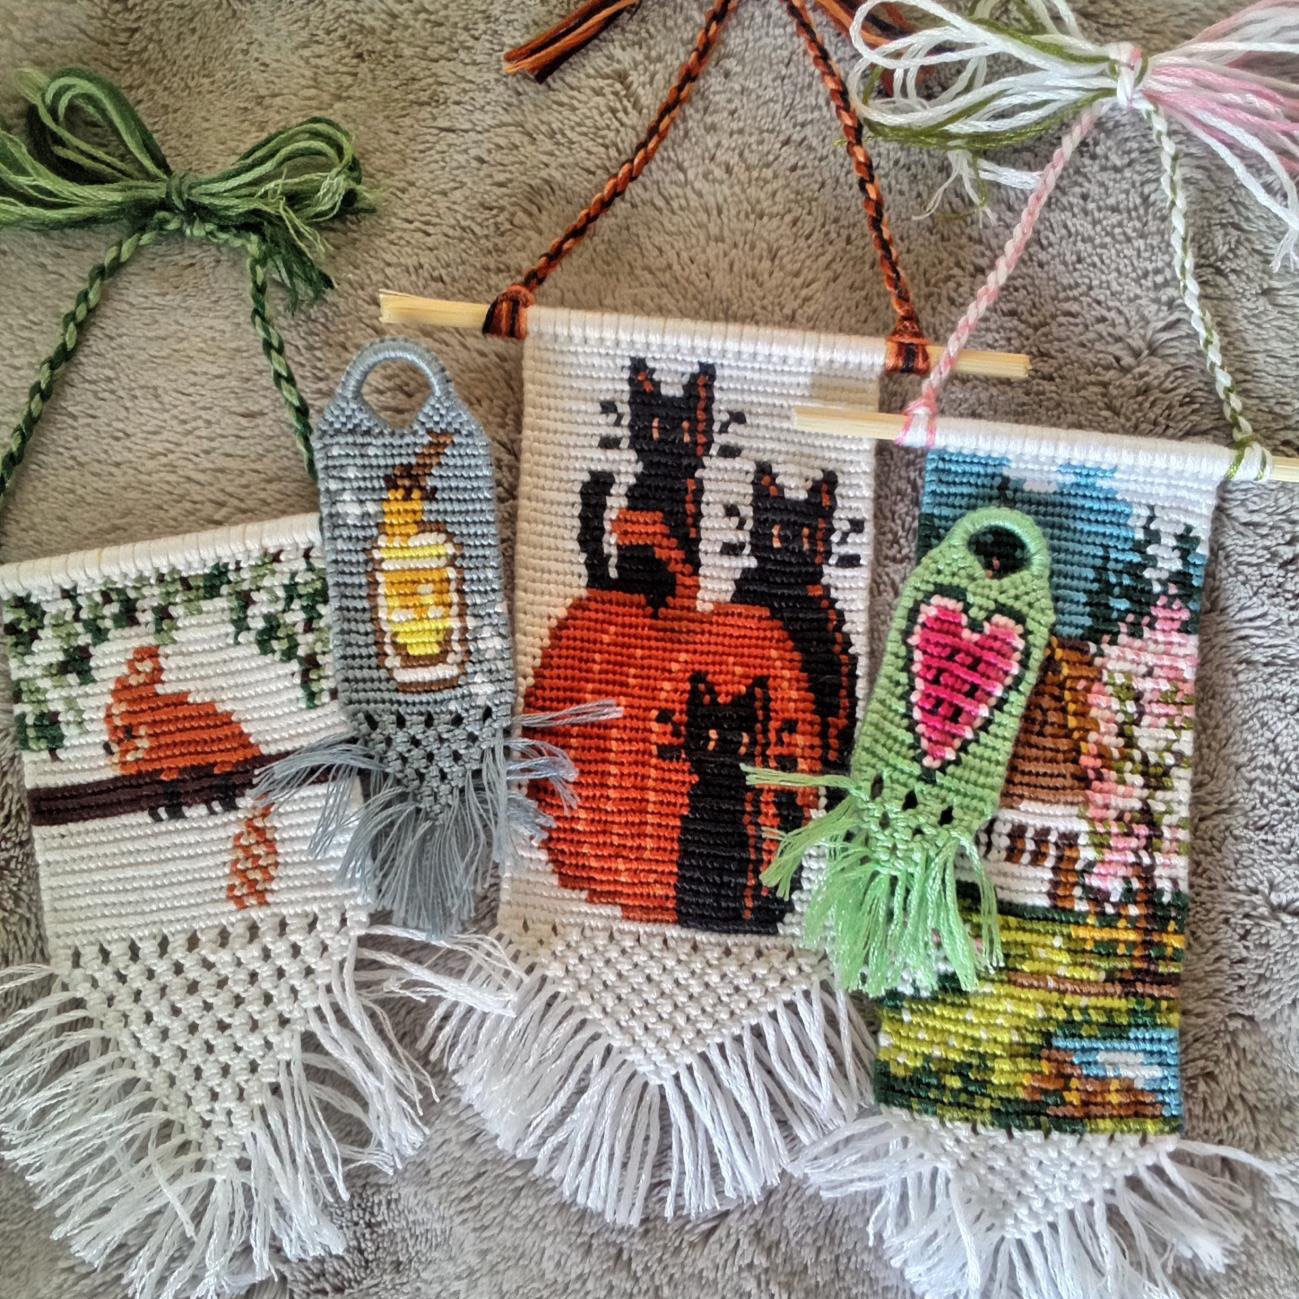
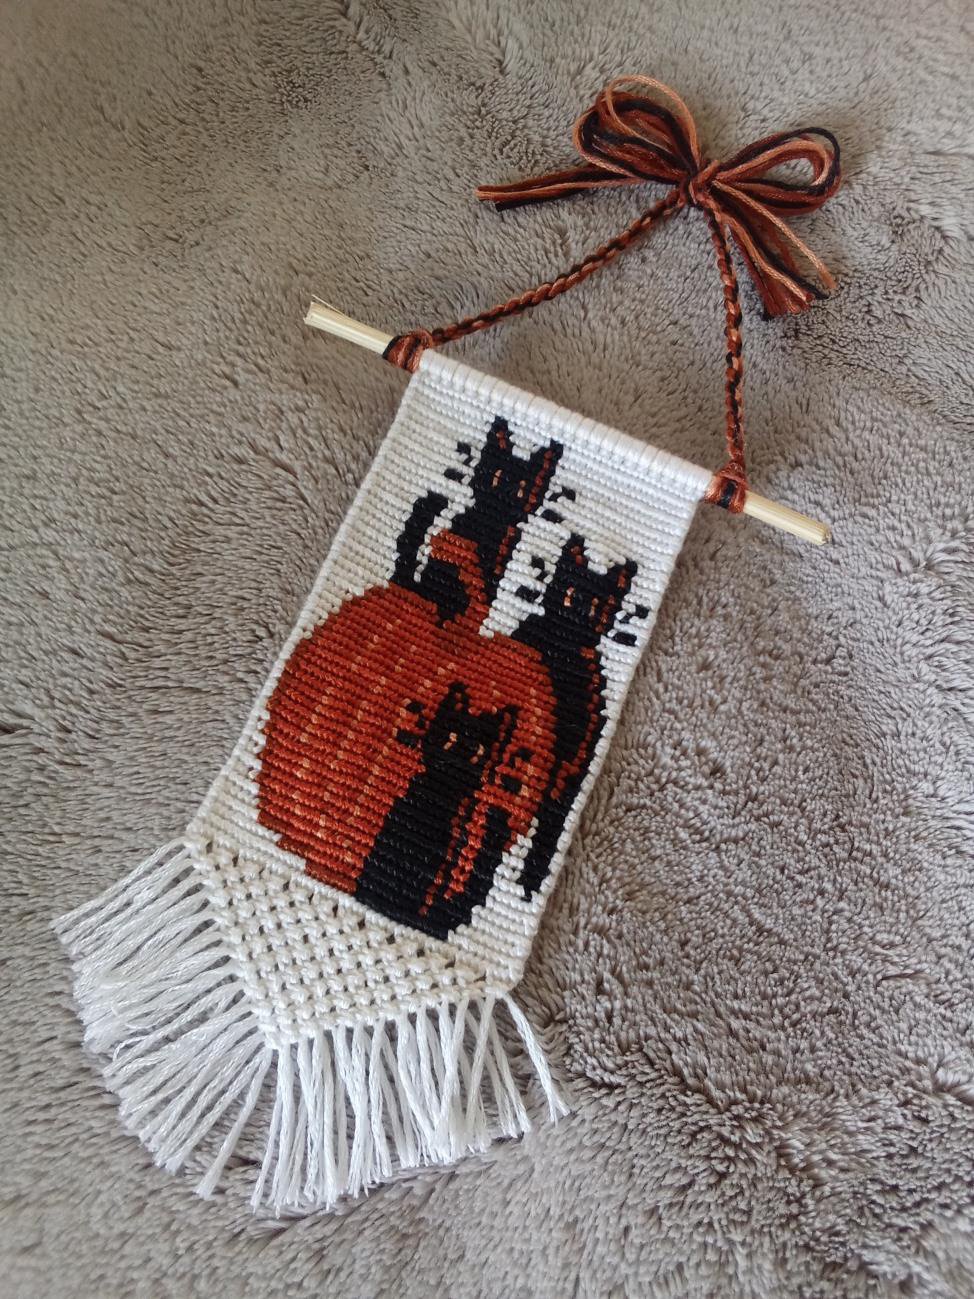
When you are finished it should look something like this!
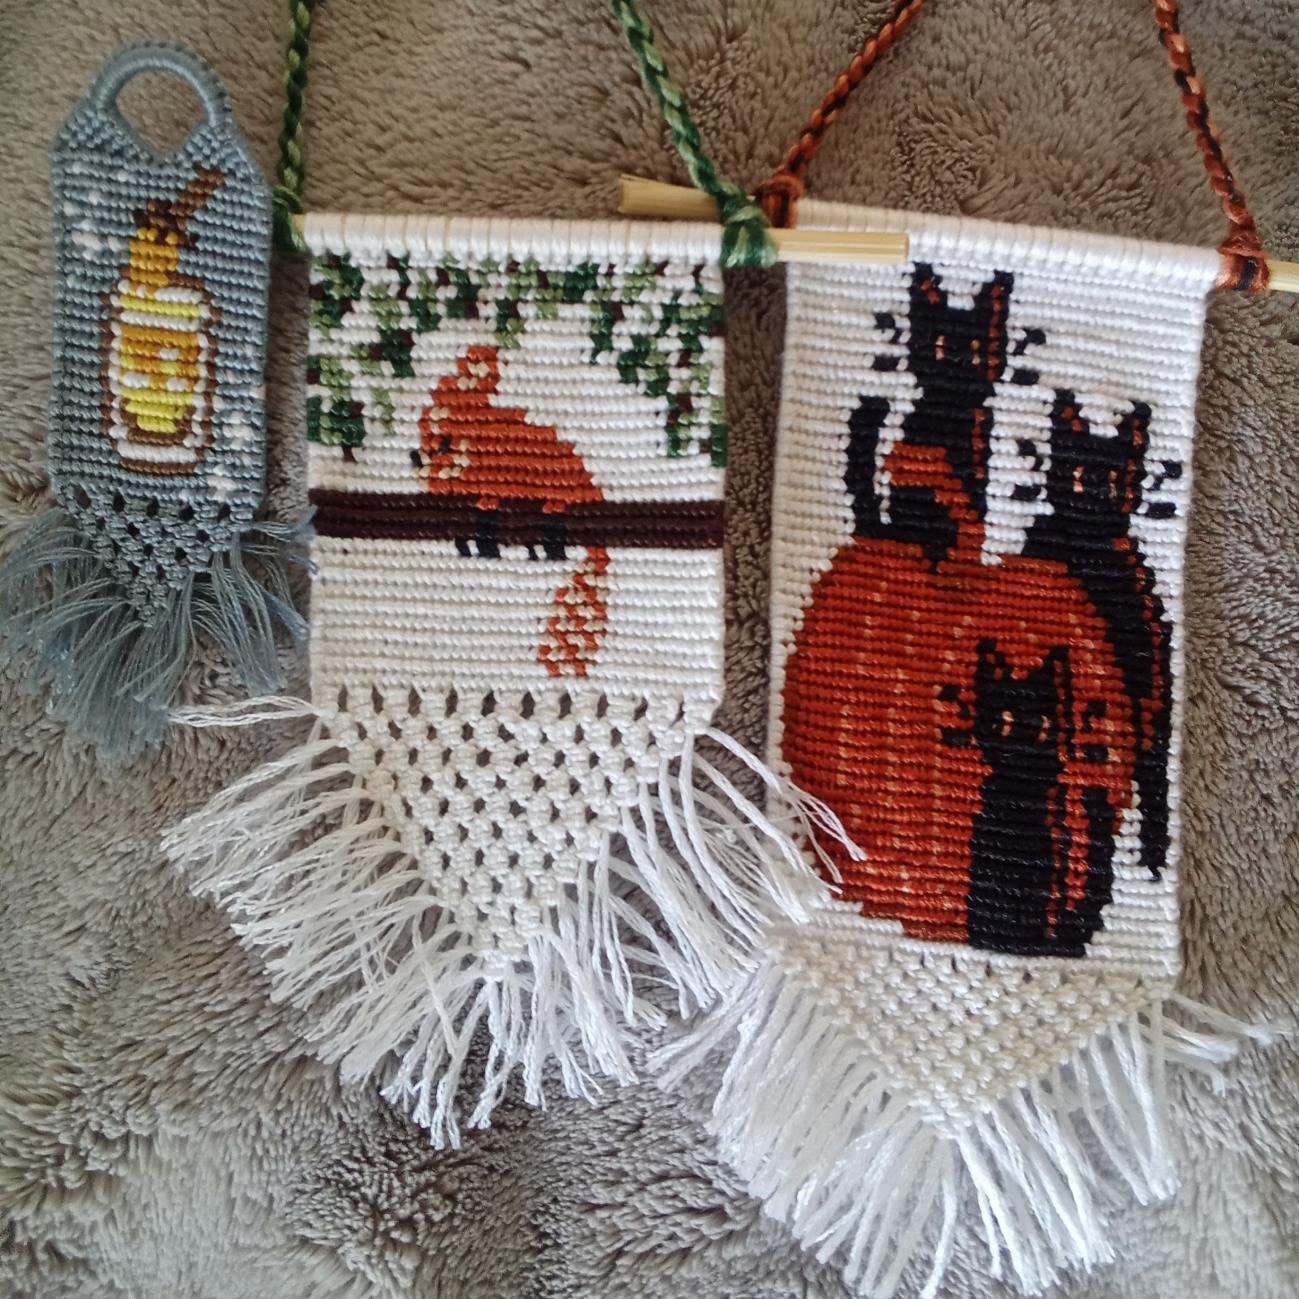
Or these.
Tapestry end video tutorial recommendation - by @_kinseyb.